Teaching JavaScript to Kids: ELI7 Insights
DigitalCrafts Alumnus, Dan McKinney, has held a variety of jobs: Chef, Resterantuer, Business Owner, and as of recent, an Analyst for Textkernel. Dan's most important job? Being a dad to his seven year old daughter, Stone. After finising DigitalCrafts Immersive program in August, Dan decided to take on the onerous task of teaching his daughter the basics of software development.
"Ignoring the Marshmallow Test, I decided to build an application with her first to show her the potential of simple code rather than starting with the basics. The genesis being that an app that allows her to talk to her friends like a cell phone would pique her interest more than another “Hello World!” page. So we started the adventure. As a former chef, I tried to explain the concepts of setting up the environment for the code as stocking your inventory will all the ingredients necessary.
First we needed to design a menu item aka the text application. To start we created a blank canvas for the item known as “index.js” inside of our recipe book or folder. The text application requires express, socket.io, ent, and fs. I explained that these were like recipes or pre made items needed to make the final dish.
    npm install --save socket.io
    npm install --save express
    npm install --save ent
    npm install --save fs
You can also do this in one line of code but to explain to a seven year old we installed them together. I explained that we needed to order these two items and then require them in the process for the menu item by ‘require’-ing them.
var app = require('express')();
    var server = require('http').createServer(app);
    var io = require('socket.io).listen(server);
    var ent = require('ent');
    var fs = require('fs');
The http acts literally and figuratively as the server who relays the messages/requests. The fs and ent are added to help with encryption and handling file systems. We decided some parts of the code along are better explained as magic like these two.
Next we created a route that would tell the cook where to find and then place the items when requested using the express route handlers (‘get’, ‘post’, ‘put’, ‘delete’). There is a request for the item and a result known as (req, res). These ‘arguments’ are passed into a function that emits a result. Index.html was created as a page/plate to display the information/item.
app.get('/', (req, res) => {res.sendFile(__dirname + ' /index.html') });
The route takes the ‘req’ and returns a ‘res’. We then send the information to the directory and page it’s rendered. Next we created some fields and styling for the display page. I let her pick the color(bright pink).
<!DOCTYPE html>
<html>
<head>
<meta charset="utf-8" />
<title>StoneScript</title>
<style>
#zone_chat strong {
color: rgb(233, 220, 220);
background-color: rgb(190, 45, 135);
padding: 5px;}
</style>
</head>
<body>
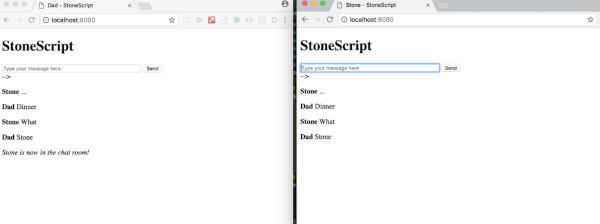
<h1>StoneScript</h1>
<form action="/" method="post" id="chat_form">
<input type="text" name="message" id="message" placeholder="Type your message here" size="50" autofocus />
<input type="submit" id="send_message" value="Send" />
</form>
We included jQuery which I explained was a quick was to search and find items much like colloquialisms or lingo in restaurants. This way we could set up the socket.io so two windows connected could talk bidirectionally or to the server from the browser based on events. This way you don’t have to refresh or request data for the real time text to be shared and displayed. '
    <section id="chat_area"></section>
    <script src="http://code.jquery.com/jquery-1.10.1.min.js"></script><script src="/socket.io/socket.io.js"></script>
The next part or the main course of the code is a little more difficult to convey. “The more I learn, the more I realize how much I don’t know”. First we set up the socket connection on port 8080. Then we created the prompt to enter your handle and display the username.
    var socket = io.connect('http://localhost:8080');
    var username = prompt('What is your handle?');
    socket.emit('new_member', username);
    document.title = username + ' - ' + document.title;
You can use socket to display messages every time there is an connection or a new member joins the chat room with socket.on.
    socket.on('message', (data) => {
    insertMessage(data.username, data.message)
    })
    socket.on('new_member', (username) => {
    $('#chat_area').prepend('<p><em>' + username + ' is now in the chat room!</em></p>');
    })
The next bit of code uses jQuery to search the chat form when items are submitted. It takes the value and emits’ it to the room using the arguments of which user submits and their message.
    $('#chat_form').submit(() => {
    var message = $('#message').val();
    socket.emit('message', message);
    insertMessage(username, message);
    $('#message').val('').focus();
    return false;
    });
The function insertMessage is used as a placeholder and needs to be defined for what and how the message/meal is displayed when placed before the consumer.
    function insertMessage(username, message) {
    $('#chat_area').prepend('<p><strong>' + username + '</strong> ' + message + '</p>')
    }
Our index.html file/plate design is finished at this point. I explained that now came the magic of using socket.io to communicate. We needed to write a few more lines so that the text application communicated effectively. At this point my student was starting to crash but I promised we would get this working and have a useable product they we built ourselves.
The beauty of socket.io is in the code below. It allows me to type a message in my phone and it is immediately sent to my daughter’s tablet thus erasing the excuse that she didn’t hear me to brush her teeth…which of course is the real reason for this pioneering venture.
    io.sockets.on('connection', (socket, username) => {socket.on('new_member', (username) => {username = ent.encode(username);
    socket.username = username;
    socket.broadcast.emit('new_member', username);
    });
    socket.on('message', (message) => {
    message = ent.encode(message);
    socket.broadcast.emit('message', {username: socket.username, message: message});
    });
Here when someone makes a ‘connection’ the socket displays the username/new_member and emits it to the chat room. Every time a new ‘message’ is submitted it passes the username and message through the socket and broadcasts the information.
Lastly we set up the server on port 8080. To reference the restaurant example again, I told her this was the exact position the customer is sitting in to receive the plate or the exact port that the web browser should be listening at to receive the data.
Conclusion
Teaching a subject or craft to anyone helps to strengthen your own grasp…it also tests your patience and mental stability. However, building something as simple as a chat app, todo list (no puppies harmed), weather api application with a beginner can instill interest in the magic of software development…or push them off the edge.

DigitalCrafts is part of the American InterContinental University System. Not all programs are available to residents of all states. See the Accreditation and Licensure section for information on the agencies that approve and regulate the school's programs.
View complaint information
2200 East Germann Road, Suite 100 · Chandler, AZ 85286