How to Set Up a Database Using AWS
Amazon Web Services (or AWS) is a subsidiary of Amazon that provides on-demand cloud computing platforms and APIs to individuals, companies, and governments. It’s considered the world’s most comprehensive and broadly adopted cloud platform, offering more than 174 fully featured services from data centers across the globe
Okay, that’s great. But how do you set up a database with it?
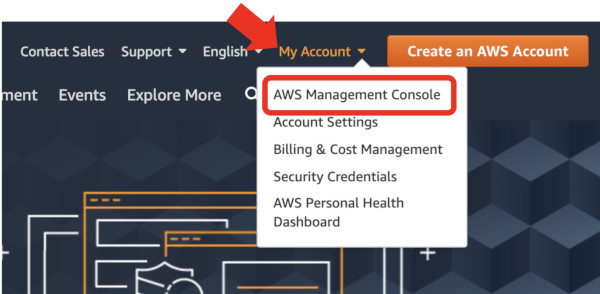
Step 1:
Log on to the site: https://aws.amazon.com/ and go to My Account -> AWS Management Console.
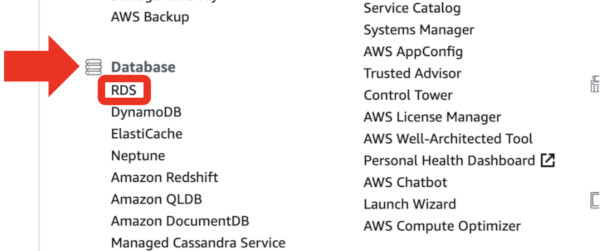
Step 2:
Scroll down until you see the Database section and click on RDS for “Relational Database Serve”.
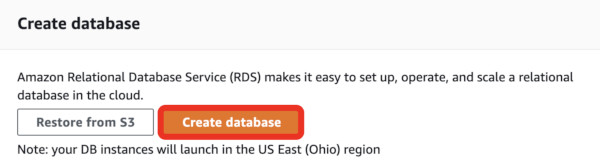
Step 3:
Click on Create Database.
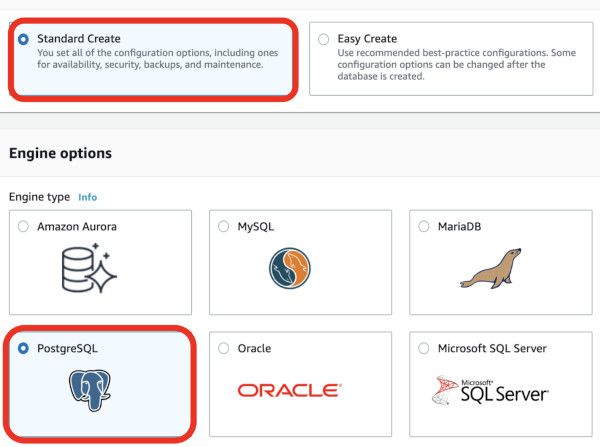
Step 4:
Choose Standard Create and PostgreSQL.
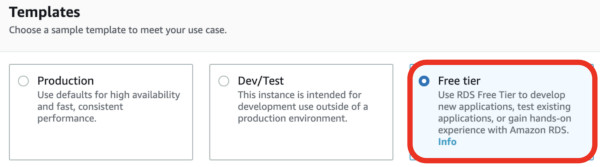
Step 5:
Choose the Free tier template.
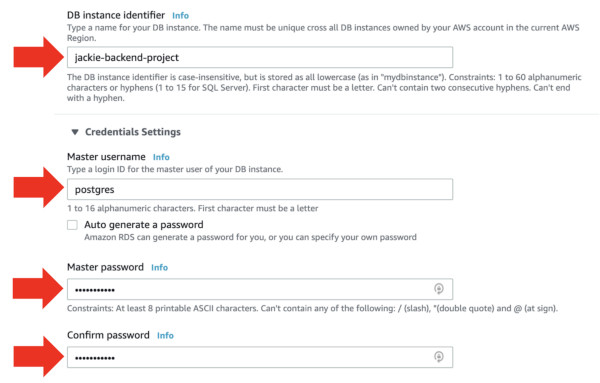
Step 6:
Change the DB instance identifier to whatever you’d like (it must be unique across all DB instances owned by your current AWS region.
Add a master username and master password.
Make sure you save this information for later!
Step 7:
Leave everything in DB instance size as is.
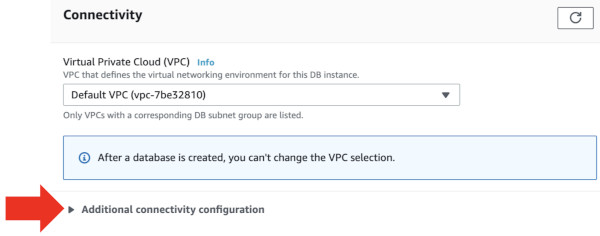
Step 8:
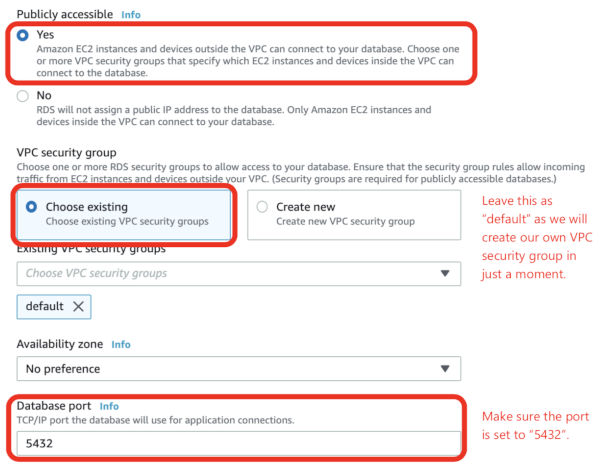
Under Connectivity, expand the Additional connectivity configuration section and set Publicly accessible to yes.
Leave the VPC security group alone for now since we’ll be editing the default one in just a moment.
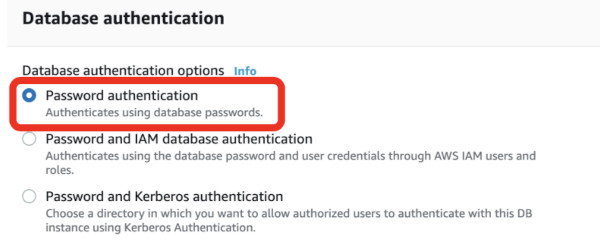
Step 9:
Leave Database authentication set to Password authentication.
Step 10:
Click Create database to start the creation process.
This could take anywhere between 5–10 minutes, so be patient!
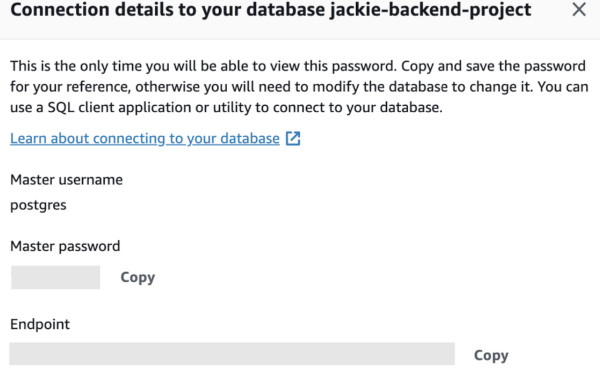
Once the database is created, the browser will display a green banner with a View credential details button—click this to view your master username, master password and endpoint.
Again, make sure you save this information for later.

Step 11:
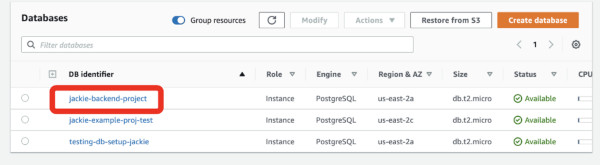
Now that the database is done, we need to update our VCP security group.
This can be done by clicking on your new database (jackie-backend-project in this example).
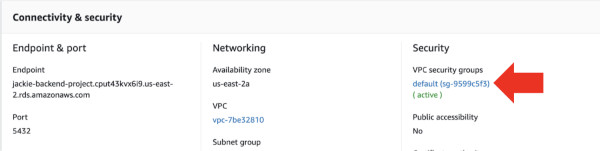
Step 12:
Search for the Security section on the right and click on the default security group (the name will differ for your own database).
Step 13:
Click on the Inbound rules tab.

Step 14:
Click on Edit inbound rules.

Step 15:
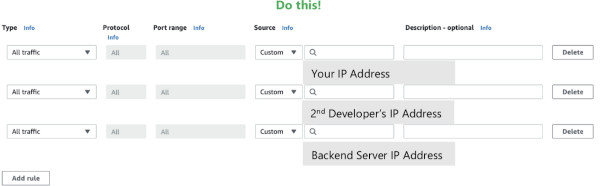
Click Add rule and fill in the Type and Source fields.
What needs to go here:
- Any public IP from which you are working from (this also includes the IPs of any developers you are working with).
- The backend server that will be interfacing with the database (like Heroku, Firebase, any other Amazon services).What you could put here to give anyone access to your database, but will be a HUGE security risk:
- `0.0.0.0/0`
- The usage of `0.0.0.0/0` is not recommended outside of test scenarios, because it can give anyone and everyone the opportunity to connect to your database.
- Just...please don't do this (;﹏;) - from a Network Engineer.
You can use 0.0.0.0/0 if you’re feeling lazy, but I don't recommend it. You're just leaving the worry of fixing the security risk to future you.

Step 16:
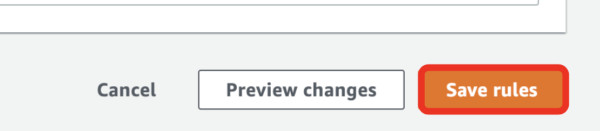
Once you’ve added the necessary rules, click Save rules in the bottom right-hand corner.
Congratulations! You’ve setup your first AWS database! Now let’s get you connected to Postico/pgAdmin.
For Mac users, skip to Step 17-A. For Windows users, skip to Step 17-B.
Step 17-A:
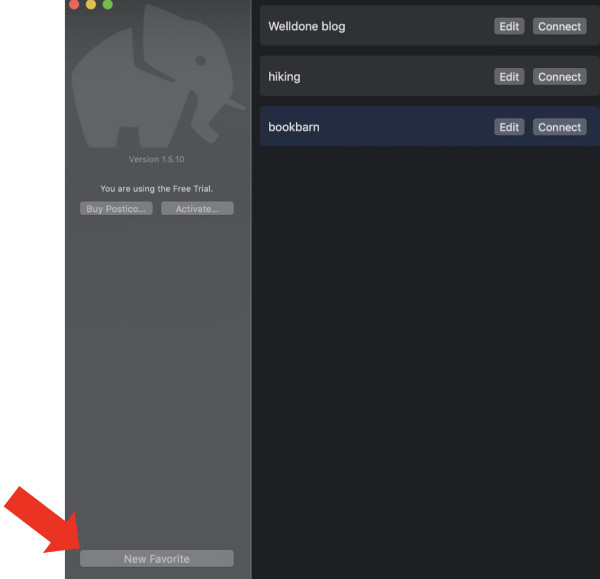
1. Open up Postico and click New Favorite in the bottom left-hand corner.
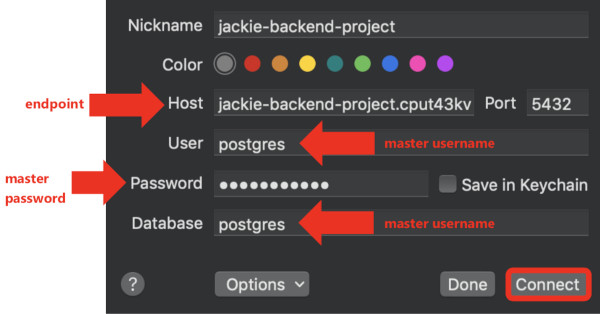
2. Fill in the fields with the information you noted earlier of your database’s master username, master password and endpoint, then click Connect.
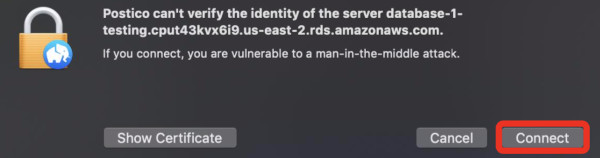
3. If everything is working as it should, you should then see a pop up saying something along the lines of “Are you sure you want to trust this certificate?” Click Connect and then you’re connected!
Congratulations! Postico is now connected to your AWS database! Move on to Step 18 for the Sequelize setup.
Step 17-B:
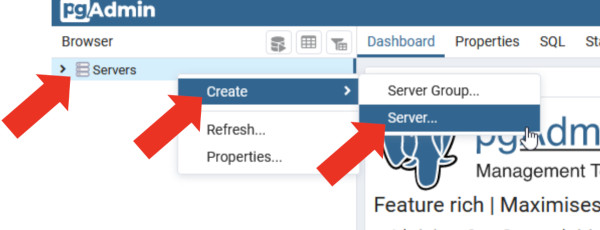
1. Open up pgAdmin and right-click Servers -> Create -> Server…
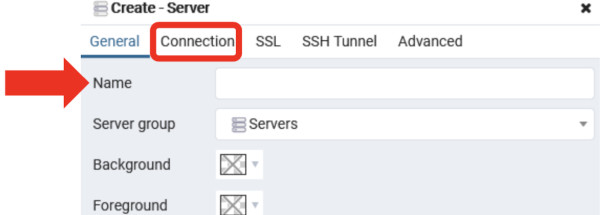
2. Give your server a Name and click on the Connection tab.
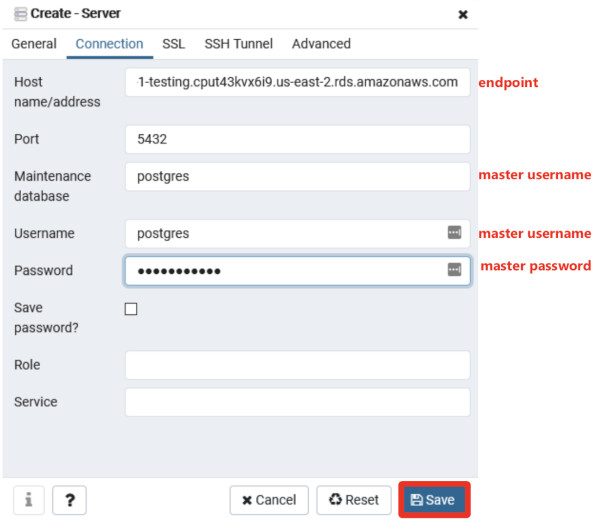
3. Fill in the information you saved from AWS as follows and then click Save.
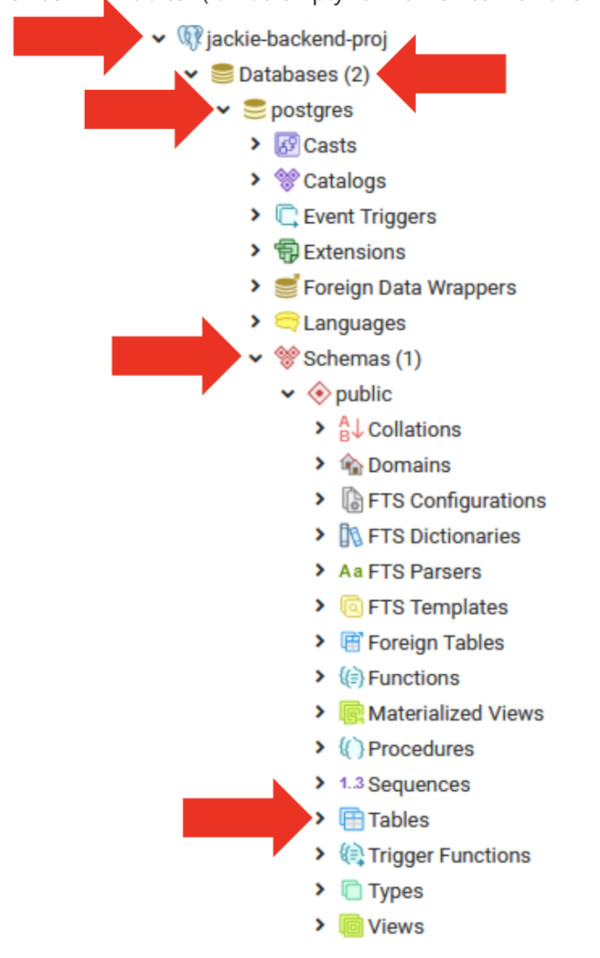
4. In the left-hand column, expand your <SERVER_NAME> -> Databases -> <MASTER USERNAME> -> Schemas -> Tables (It’ll be empty for now, since we haven’t created any models yet).
Congratulations! pgAdmin is now connected to your AWS database! Move on to Step 18 for the Sequelize setup.
Step 18:
Inside of your project repo, enter the following command into your terminal:
npm i sequelize pg
Step 19:
Initialize Sequelize with the following:
sequelize init
Step 20:
Open the config.json file and adjust the values to reflect the details from your AWS instance and then save.
Remember, your information will be different from mine.
{
"development": {
"username": "MASTER USERNAME",
"password": "MASTER PASSWORD",
"database": "MASTER USERNAME",
"host": "AWS ENDPOINT",
"dialect": "postgres"
},
"test": {
"username": "MASTER USERNAME",
"password": "MASTER PASSWORD",
"database": "MASTER USERNAME",
"host": "AWS ENDPOINT",
"dialect": "postgres"
},
"production": {
"username": "MASTER USERNAME",
"password": "MASTER PASSWORD",
"database": "MASTER USERNAME",
"host": "AWS ENDPOINT",
"dialect": "postgres"
}
}
Step 21:
Run your first migration with this command:
sequelize db:migrate
Step 22:
Create your first model with the following (Please note, you can change the model name and attributes to reflect whatever information you need a table for):
sequelize model:create --name <TABLE_NAME> --attributes '<COL1_NAME>:<DATA_TYPE> <COL2_NAME>:<DATA_TYPE> <COL3_NAME>:<DATA_TYPE>'
Always remember to run `sequelize db:migrate` after creating a model to update your database!
And that concludes this basic AWS setup guide. Good luck with your project!
This post is written by Jackie Legacion, a graduate of our Houston campus, and first appeared on Medium. Be sure to check out her website and connect on LinkedIn.

DigitalCrafts is part of the American InterContinental University System. Not all programs are available to residents of all states. See the Accreditation and Licensure section for information on the agencies that approve and regulate the school's programs.
View complaint information
2200 East Germann Road, Suite 100 · Chandler, AZ 85286